Cannondale Synapse Compact Alloy Road Bike
Making a draft horse out of a race horse?
I started thinking about ultralite bicycle touring a few weeks ago and decided to experiment a bit with my touring kit. It seem like ultralite cycling falls into a few main categories so I will attempt to break it down here.
1. Road touring with credit card and minimal clothing.
2. Road touring with minimal tarp shelter, bedding and clothing utilizing mostly hotels and restaurants along the route.
3. Self supportive road touring utilizing light weight but ample shelter, comfortable bedding, extra clothing, cooking kit, bike tools, water filtration and electronics.
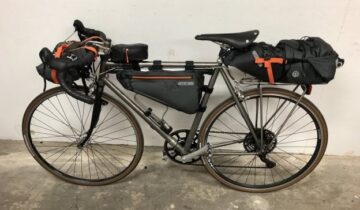
There is a happy medium between fully loaded expedition touring and ultralite deprivation touring. It’s not necessary to be uncomfortable just to shave a few ounces of weight from your load. The amount of load weight on a bicycle is relative to each rider and bike. So shooting for some magic number (like 15 pounds base) is unrealistic without taking into account the length of the tour, the physical shape of the rider, the types of terrain expected to encounter and the build of the bike. It is much more logical to begin with your absolutes and build from that point. For example; If you are planning on using a road bike with a seat mounted rear rack (like the one pictured above), you should keep the total weight of panniers and gear to under 20 pounds. Being a guy who has routinely traveled long distances with extremely heavy expedition loads sometimes exceeding 120 pounds, 20 pounds seems like nothing in comparison. So, the bike and this rider can handle 20 pounds. This is the starting point. Now the trick is to eliminate all but the most essential items and replace some with newer ultralite materials while keeping the weight below 20 pounds. The idea is to only keep the items which make a successful tour comfortable.
UPDATE: The bicycle in the photo above has been optimized in the manner described above and weighs in at just under 50 pounds including bike, rack, panniers, bar bag, saddle bag and all items neccessary for a long distance self supportive tour. The only drawback is that it rides like doggy poop, feels unstable and takes a lot of concentration to operate. Oh well ???? Back to the drawing board ! One good thing that has come from this experiment is I’ve narrowed my touring kit down quite a bit and also added some cool ultralite upgrades. When I mount the panniers with a scant 10 pounds of gear in each to a Surly LHT or Troll with steel racks, 26″ wheels and 2″ touring tires, I can hardly feel the difference. So the real trick is not to try to make a race horse into a draft horse, the trick is to lighten the load on that steel Clydesdale and make it perform quicker. So, that being said; here’s how I went about stripping down the excess weight without compromising a comfortable nights sleep or hot meals.
Here are my shelter and sleeping items:
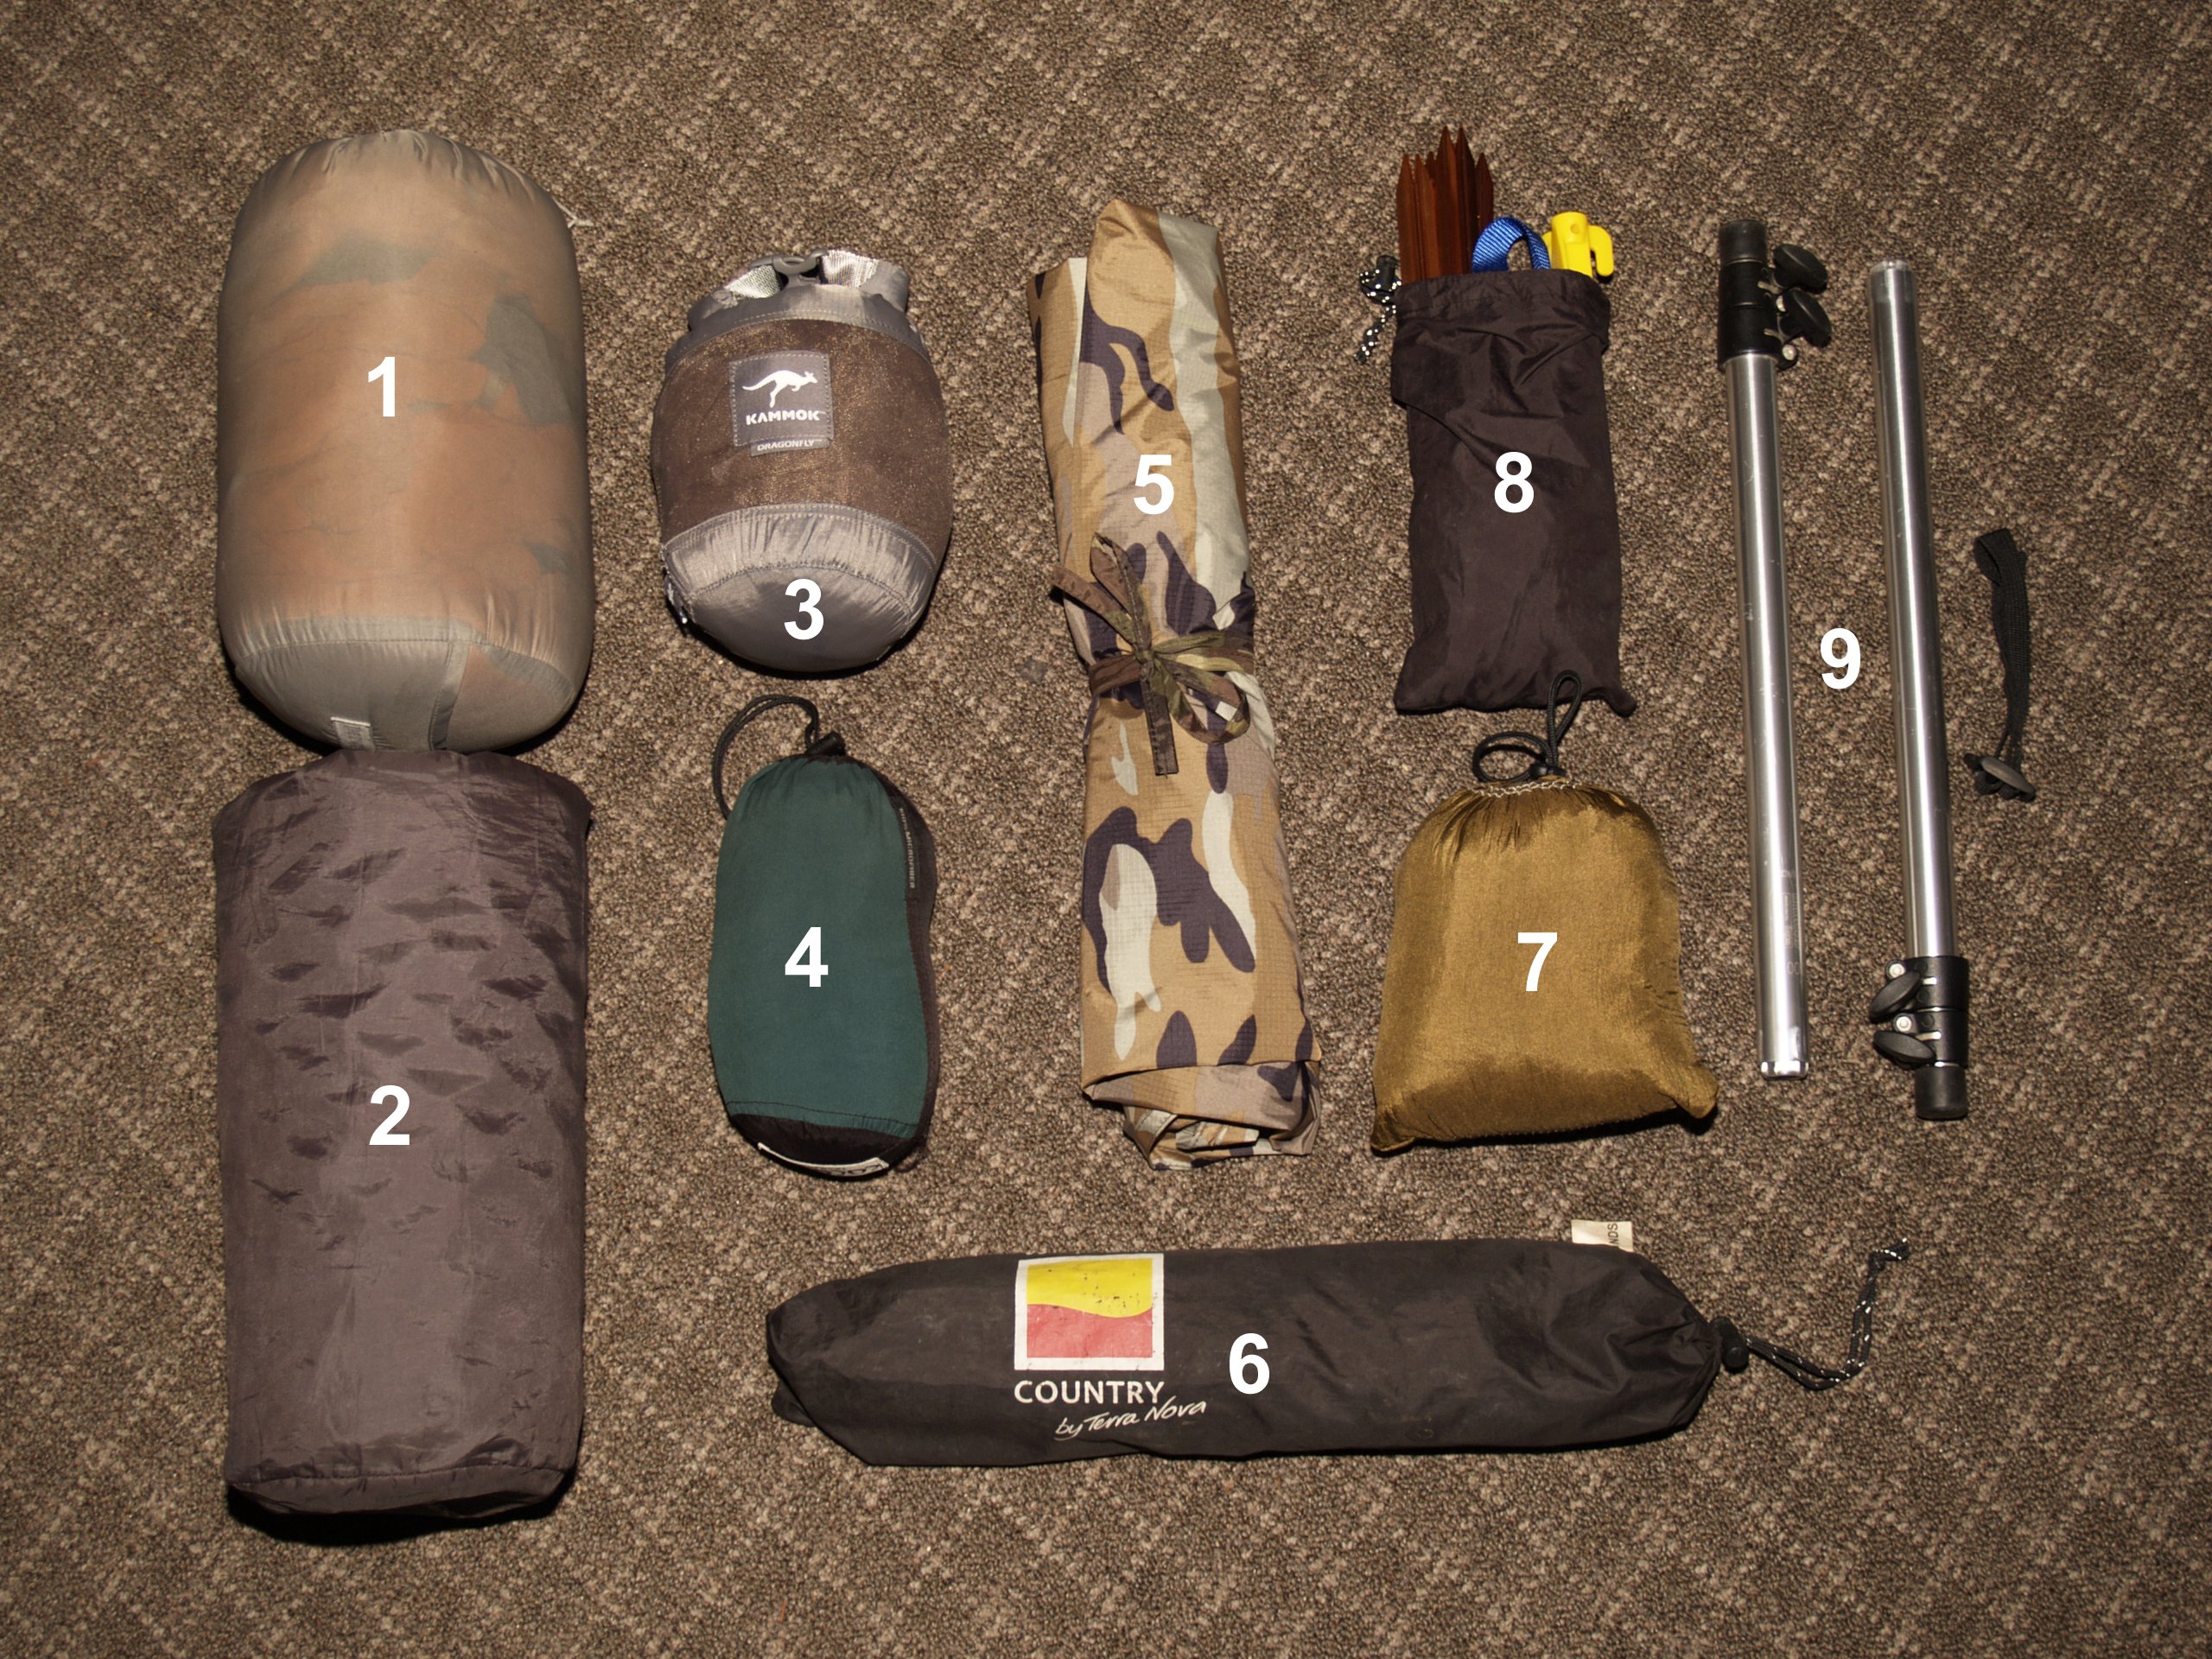
Click on Image to Enlarge
- Thermarest Antares Sleeping Bag
- Thermarest Prolite Sleeping Pad
- Kammock No-See-Um hammock bug net
- Cocoon Microfiber Sleeping Bag Liner
- 10’x9′ Asymetrical Diamond Fly Tarp (for hammock or bivy)
- Terra Nova Waterproof Ground Cloth (for bivy)
- Ultralite Nylon Tafetta Hammock with Whoopie Slings
- Alluminum Stakes and Tree Straps (for hammock or bivy)
- Collapsible Aluminum Poles NOTE: These have been traded out for some DAC Featherlite poles at half the weight. (used to construct tarp tent when on the ground)
The total weight of all the items in my shelter/sleeping kit is just under 9lbs (4 Kilograms). This all fits easily into one of my 40L Ortlieb rear panniers.
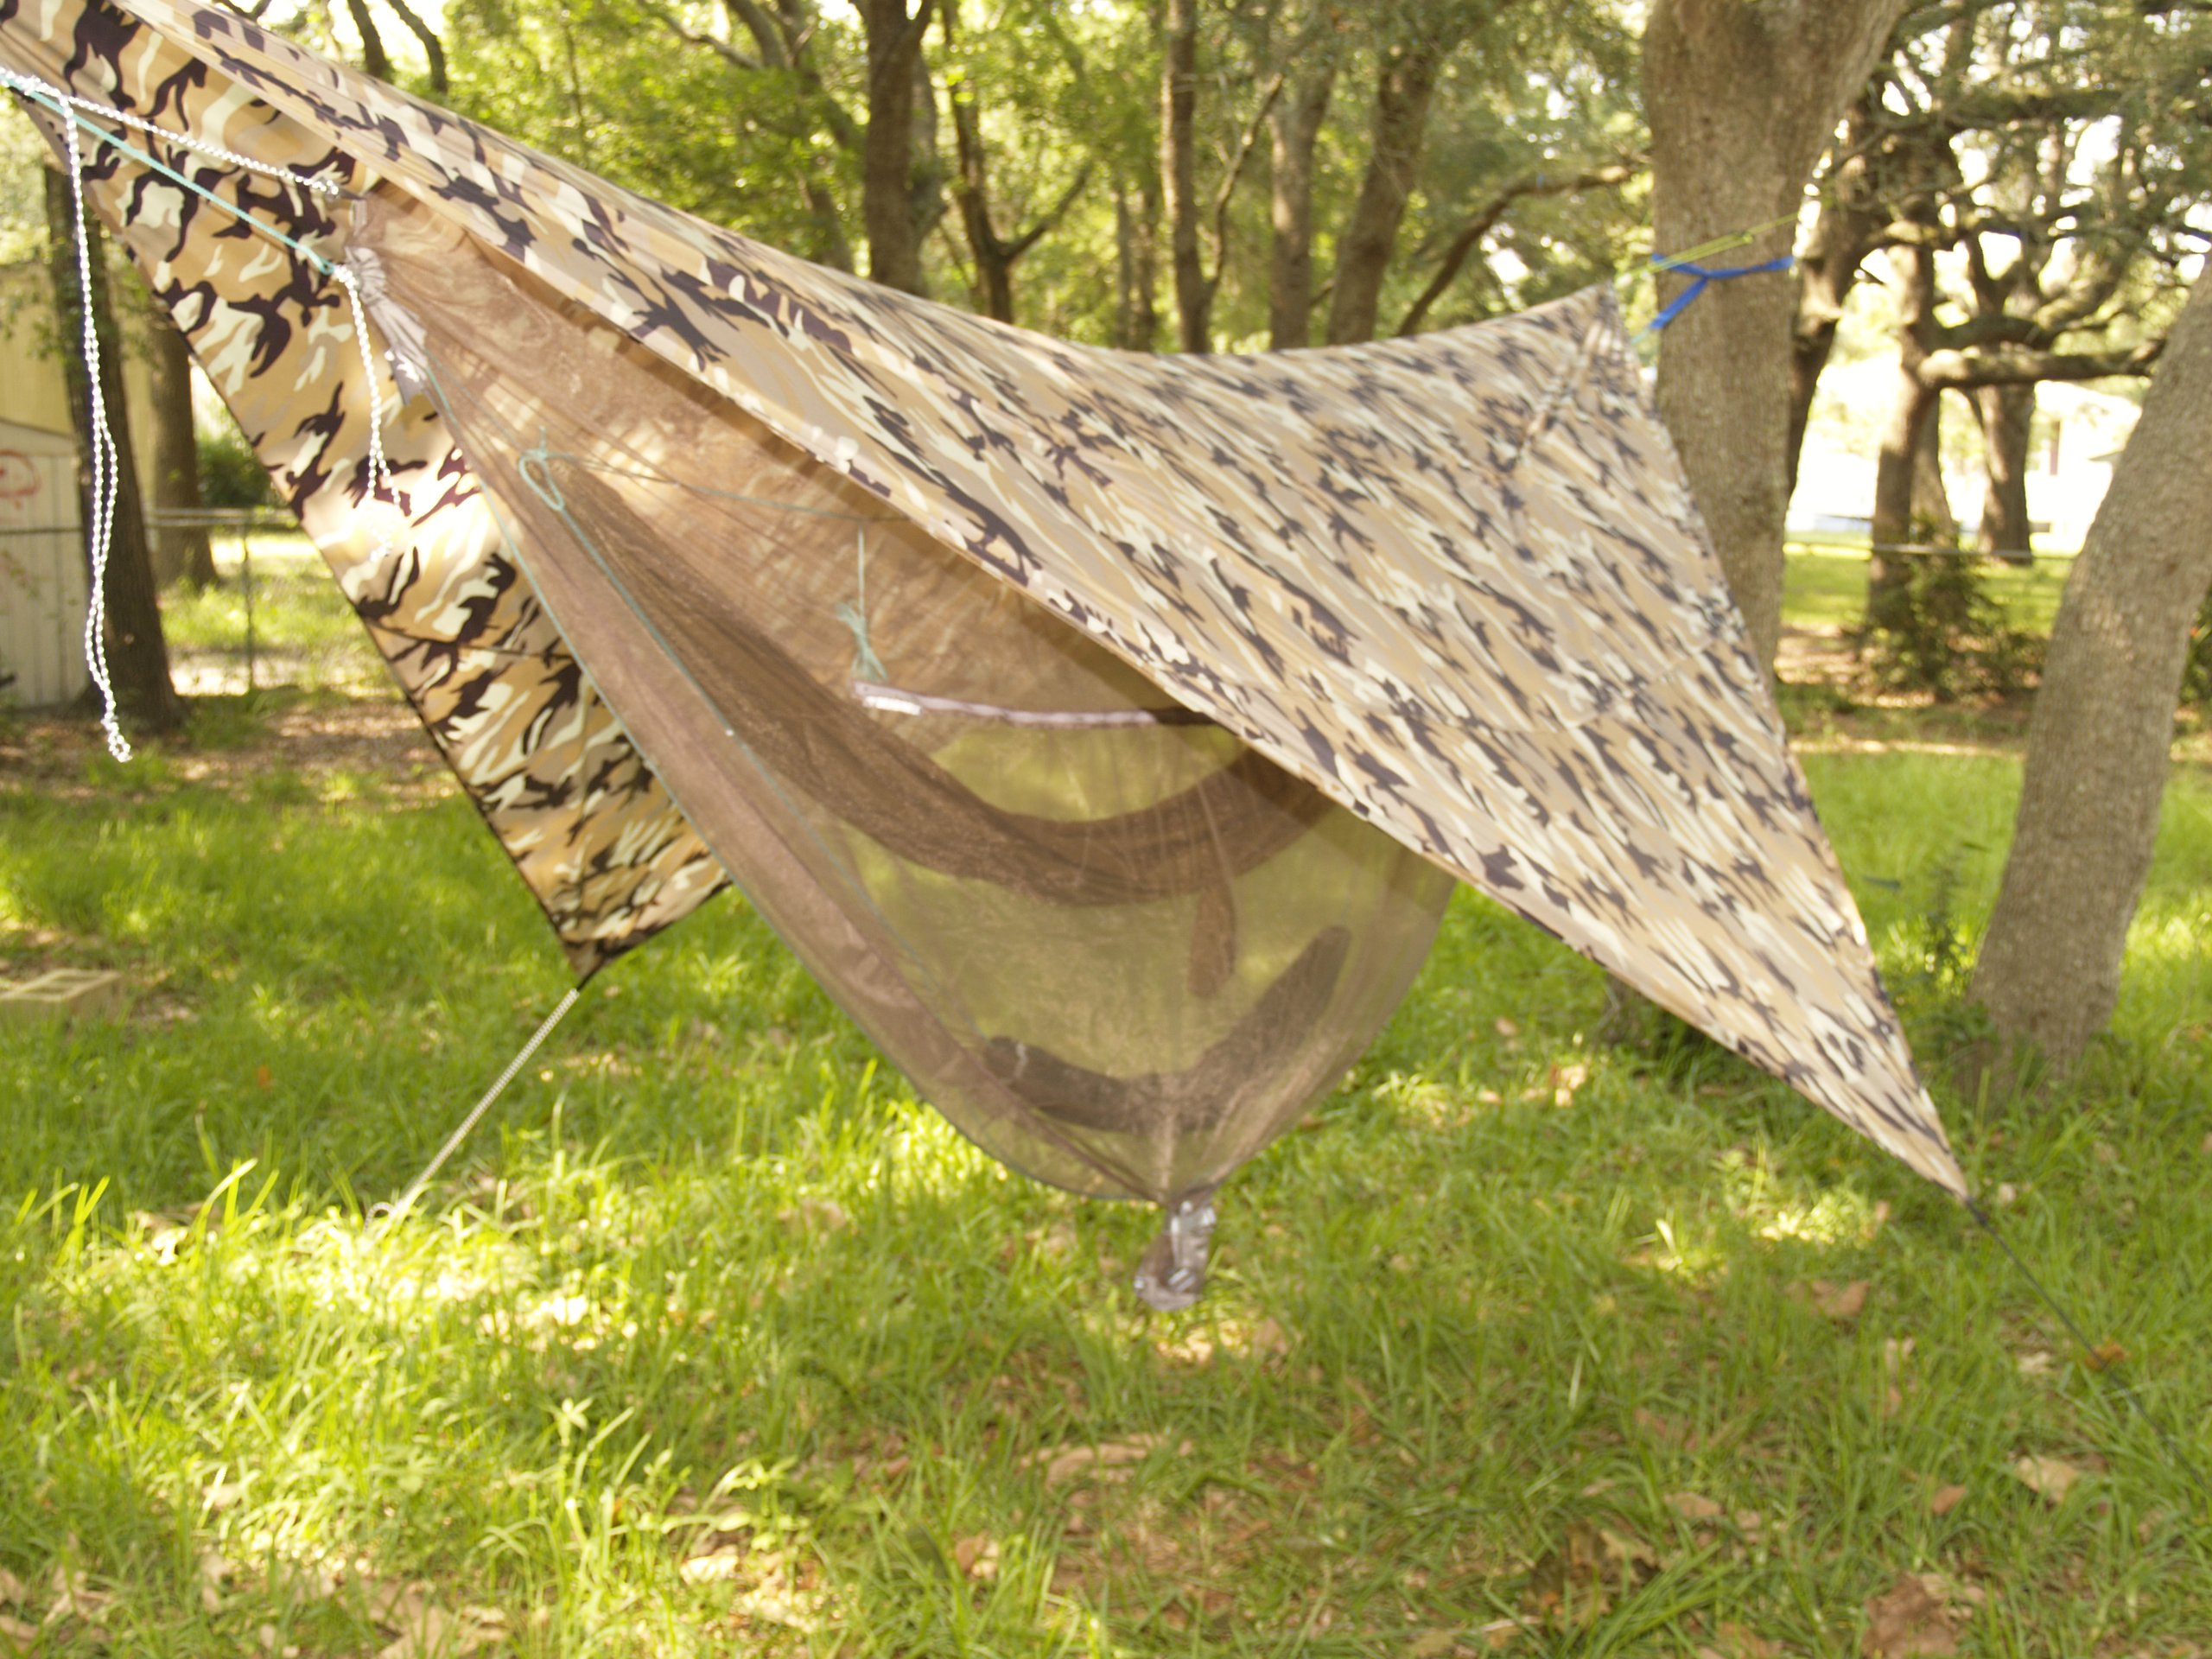
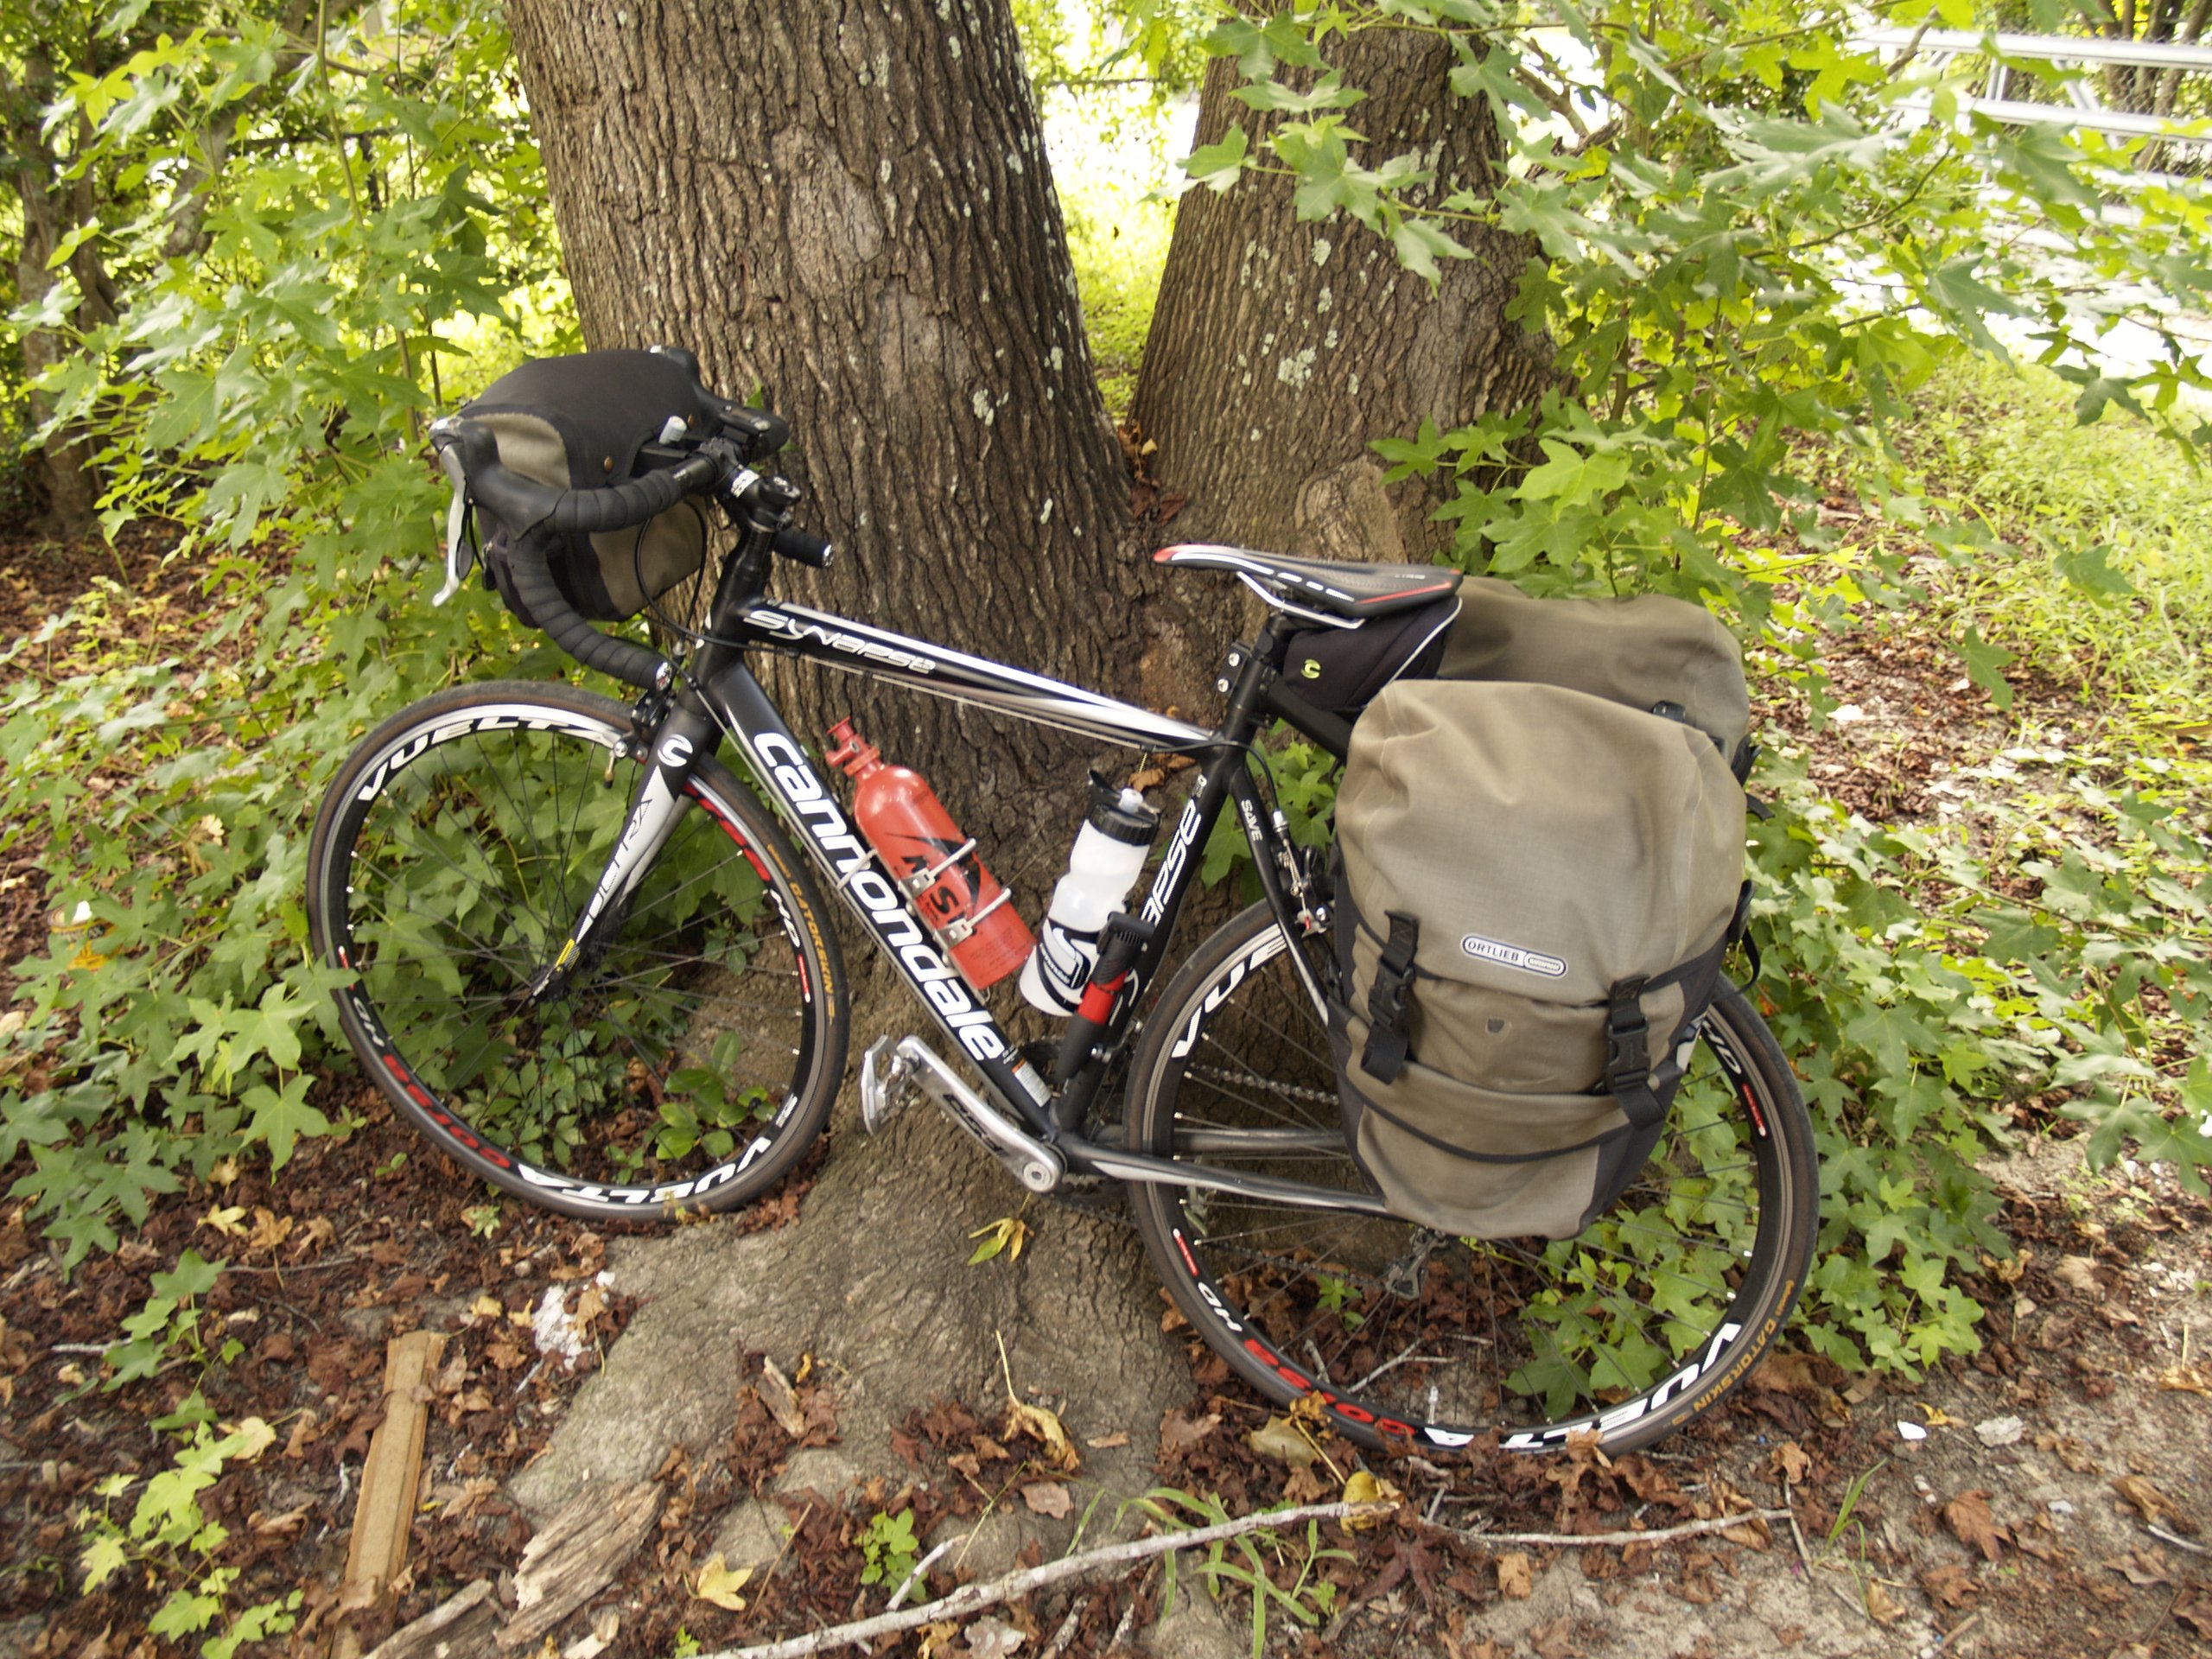
Hammock rain fly in use showing mosquito netting, hammock and gear sling hanging below.
The second part of this two part series will address clothing, cooking gear and water carry & filtration.
Clothing choices for a bike tour.
Water filtration and purification on tour.